The 3D Stand Design Process
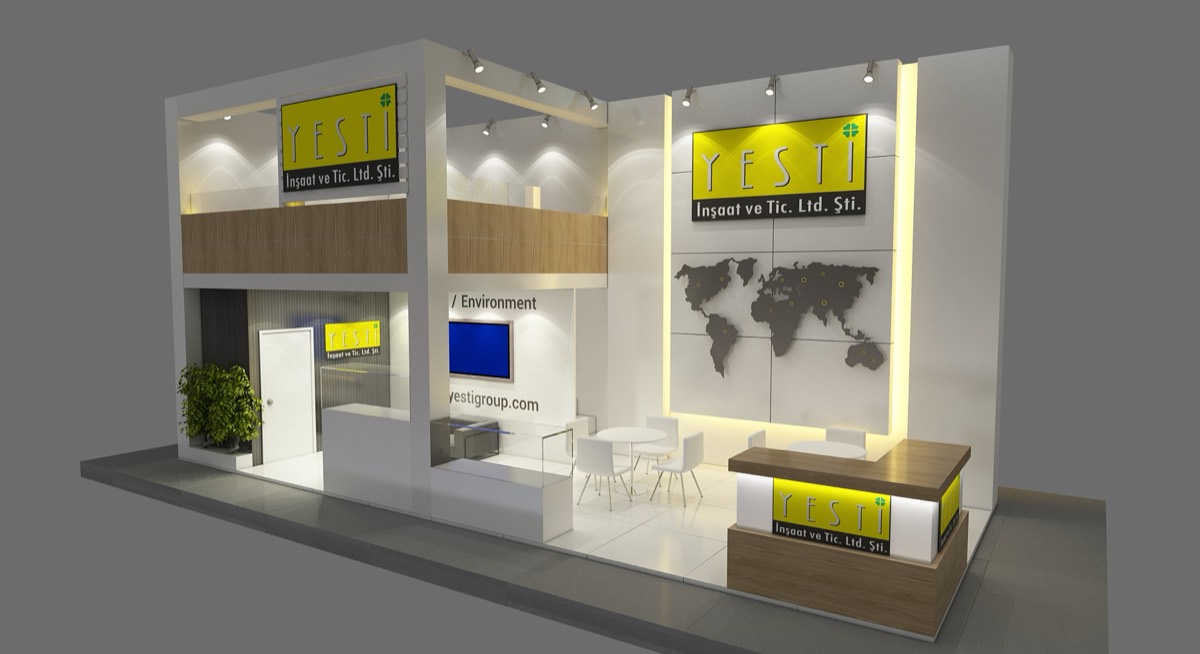
For a custom stand, the phase before production decides everything: the 3D design process. Run properly, it means the fair holds no surprises — you have already walked through your stand months earlier, on screen.
1. The brief
The design team needs:
- Plot dimensions, position and open sides, from the organiser's floor plan
- The participation goal: sales meetings, image, launch
- Products to display, with dimensions
- Required spaces: meeting room, storage, kitchenette, reception desk, demo area
- Brand identity guidelines
- The budget range
Withholding the budget is a common negotiating reflex and a false economy: it produces concepts that get discarded for costing the wrong amount. A known range gets designed to.
2. Concept design
The first renders show the big decisions: massing, facade character, visitor flow, message placement. Judge them at that level — is the stand recognisable from down the aisle, does the entrance invite, are products on the main path, is the meeting area sheltered from traffic — rather than debating materials. Give the design team the fair's technical rulebook on day one: height limits, closed-facade ratios toward neighbours, rigging permissions all vary by fair, and a non-compliant design cannot be fixed on site.
3. Revision rounds
Deliver feedback consolidated, through one channel; scattered notes from five people produce contradictions and delay. Make requests with reasons — "we want the entrance more open because visitors hesitated at the threshold last year" points the designer at the right solution. Define the number of included revisions in the contract; out-of-scope rounds cost time and money by design.
4. Approval and production drawings
The approved 3D becomes dimensioned technical drawings, material schedules, the electrical plan and the graphics measurement sheet. Changes after this point hit production directly — evaluate them with their cost and calendar impact attached. At international fairs, submit drawings for organiser approval and put that review time in the plan. Before release: three cross-checks — drawings against fair rules, electrical plan against the ordered power, graphics against the print sheet — plus mounting requirements for heavy exhibits, which no one can improvise on site.
The render is a promise
For a serious contractor, the visual is a commitment: materials, lighting and graphics on site must match it. When evaluating builders, ask for render-versus-photo pairs from past projects — that comparison is the honesty test. Design and production under one roof concentrates the accountability for any gap in one place, which is exactly where you want it.
A structured review checklist
Review concept renders with a fixed question set rather than taste alone: what does the far view say to a passing visitor; does the entrance read as open; are products on the natural walking line; is the meeting area sheltered; do storage and service circulation avoid guest space; is the logo visible from every open side? Structured review keeps revisions purposeful. Before production release, run the three reconciliations — drawings against fair rules, electrical plan against ordered power, graphic dimensions against the print sheet — and for a first-time custom build, ask for a trial assembly at the workshop: fit problems found indoors cost hours, the same problems found in the hall cost the build window.
For end-to-end support with your exhibition stand or corporate event — from design to on-site delivery — get in touch, or see our recent projects.